Victory Garden

img_3442

Let’s talk about something this year that has been good and inspirational: the veg garden.

The ranch has a sizable area fenced off in the backyard for a vegetable garden (or a rose garden?). It separates a big portion of the yard (probably 16×32) from the grass and keeps large four-legged animals out (but not the rats or squirrels, lol). I don’t think it would have occurred to us to build a fence around such a big portion of the yard for a garden. But we like it and have been using it every year since we moved in.

This yeah we went wild with seeds, since March is when the stockpiling panic began. And I had anxiety. Which manifested itself in seed collecting & garden planning! My mom also mailed us a ton of seeds which was great!

We planted: shelling peas, green beans, spinach, kale, butter lettuce, cauliflower, carrots, and got some tomato starts from a fancy local place. We couldn’t find swiss chard seeds, so I’m gonna let the monster chard plants go to seed and harvest those. Anyone need any?

Here’s how it’s looking:

Winter at the Ranch

hike-2-e1578603040603.jpg

We’ve been mostly home this December and January, other than a couple short work and family trips. It’s the time of year that it’s a tough slog. Get to work when it’s dark, leave when it’s dark. But we’re still getting out when we can for snow hikes and dog park walks.  We’re missing the patio and the extra living space there, but honestly I like the indoor living room just as much right now.

Mrs. Strubgrass located some dry Juniper for fires which has been delightful, so most of the time we’re here enjoying this.

candle3.jpg

fireplace-1.jpg

I kind of prefer the living room with fire to the blazing summer evenings because there is less chance of Scout eating a bee(!) or monching a pile of dirt just because it’s oddly delicious. It’s more restful.

Speaking of the living room, we had a situation with the couch which luckily turned out for the best. It developed a hole (long, terrible story), and had some mildew spots lingering from when we lived in Humboldt, so there was no flipping the cushion. BUT – Laura took the risk of removing the cushion covers and washing them in the washing machine, so we could at least flip the cushions and hide the hole. This is something we had avoided doing because we were afraid the cushions would shrink or be ruined and never be the same! But not so! OMG! It’s like having a whole new couch. I am so happy!

If you need me, I’ll be right here.

Exterior Paint, New Fixtures & House Numbers

patio
We’re ready for patio season

Painting is done! But somehow I forgot to take pictures of the outside to post while on vacation. So while the full reveal is going to have to wait, here are some in progress pics.

The painters did an ok job, not great. They were reasonably priced and fast, but missed a bunch of details. But we got them to come pack and redo the areas on the front/sunny side (the most important part, geez), and my amazing wife touched up the parts that we didn’t want to wait for them to come back to finish.

We love the colors, though! We picked the same colors as Strubgrass Manor, except that the Manor required 3 colors because it was a fancy (?) Victorian. The color selection process for the Manor was arduous, which is why we decided to use those colors again. I guess we have signature exterior colors for future home renovations, too. The colors are: Benjamin Moore Willow Creek for the wall and Light Pewter for the trim.

number.jpg
Can’t miss these numbers now
fixture
Was the original color pink?
painting
Painters missed a couple spots

Before Edition: Fresh Paint for the Ranch

From the 2016 listing

We’ve focused on the interior up to this point, which has kept us busy for almost 2 years. But the outside of the ranch has been in need of some love. The color wasn’t bad, just a neutral cream color. But the trim had lots of peeling, which stood out because it was a darker color than the wall/primary. Plus the house numbers were small and up pretty high under the eave and misaligned (gasp!).

What a great opportunity for upgrades! This is just the kind of exterior project (paint, house numbers, fixtures) that we did at Strubgrass Manor, but it took us about 7 years of living there to decide to do it.

We’re DIY painters for interior projects, but not for the outside. We are probably capable of painting the outside, but just not into it. It’s part of the balance of what you want to DIY, and what do you want to hire out. Hiring professionals to paint the exterior was a no brainer (although the quality of that work can vary, stay tuned for more info on that in a future post 😐 )

The exterior work like house numbers, fixtures, plantings are all things we want to do. But we’re happy to hire someone to get on that ladder and take care of the broad strokes.

Here’s a few highlights from before:

Here’s a preview of the magic happening:

New exterior doors

front-1
Front door in progress (not us doing the work this time)

New doors on an old (or kinda old) house are an underutilized upgrade. Maybe because it’s expensive, considering it doesn’t change your life in any way. Regardless, we upgraded the front door and transom in our Eureka Victorian and we loved it! It made the house feel modern and well thought out. The old door was ugly and super drafty, so we could argue that we increased efficiency and saved money. I suspect that the curb appeal from the new door is part of how we had multiple offers and were able to sell the house so quickly, so maybe it even paid for itself.

The doors at the ranch were in serious need of an upgrade, especially the back door. The front door was admittedly kind of cool. It was a wide slab with a fashionable mid century star door knob. Trouble is, no deadbolt (!!) We tried not to worry about the lack of deadbolt too much, considering that the knob looked original and appeared to have never been tampered with.

Plus there was a screen door on the front that held a tiny bit of smoke smell from the previous owners. We never used the screen doors, other than to buffer @scout_the_intrepid when she goes crazy at the front door. The back door was pretty bad, though. Single pane glass, no deadbolt, drafty.

IMG_3189
Back door before
back-door-2
Back door before

We decided that the 2018 roadmap of upgrades included new Simpson doors and Emtek hardware (same brands that we did at the Manor). The Simpson doors are lovely and solid. We went for serious mortised Emtek hardware, this time in a brushed bronze.

We’re pretty handy, but framing and installing two new doors on our house is a bit out of scope for us. We may do the garage door ourselves some day, mainly because if it takes a few days, we won’t be much affected, and it doesn’t have to be perfect.

back-new.jpg
Back door after

In Eureka, I had some high school buddies in construction who we knew and trusted to do the doors. They did a great job and were awesome to have around. It pays to have the local connection if you can swing it. But even though we’re getting to know Portland, we had to go to google to find an installer. There are several pages of companies who do this kind of work, and we picked one that looked pretty standard and focused on doors & windows. They took forever to get our doors and hardware in, and there was a month long additional delay because they messed up the measurements, but at the end of the day, they did a really nice job and we’re happy.

front-2
Front door after *swoon

Backyard fence upgrade

The new fence from the street

The ranch backyard had been fully fenced with a 4 foot high chain link fence, which worked fine and was functional. It kept the dog in and delineated a space, but was fugly and provided no privacy. Solicitors and canvassers would walk down the driveway when they could see us in the backyard, which was super annoying.

The old gate and ye olde flagpole
The old view from the backdoor

There was also a cooky flagpole in the middle of the most prominent area of the chain link, which we used a few times to fly old (gay rainbow) faithful, as well as the Portland Thorns flag. But then the flag pole (in the middle below) broke, which made that area look even more busted.

The chainlink was in decent shape, but started to drive me crazy. It was an eyesore, and I knew that as soon as it came out, the ranch would look a billion times better in the backyard and from the street. There is a house down the street which had been flipped, and one of the first things they did to make it look better was to remove the chain line. It was a huge improvement for a very isolated task, and a bit inspirational.

Behold: a new horizontal cedar fence which Mrs. Strubgrass had installed for me as a noteable anniversary present. We love it! It creates a whole new space for the backyard, which is becoming the cool place to be.

2017 at the Ranch


It’s been a big year. There hasn’t been a new blog post since March(!), but here’s a recap of what’s been going on this year with Ranch and its occupants.

After the initial push to renovate the interior in Fall of 2016, and to deal with the surprise that the roof was actually made of Swiss cheese, we took some time off from any big and/or expensive renovation projects. In addition, after 12 years with my previous company, I switched jobs in May. This has been a smart move and a life upgrade, but has taken some focus away from house projects as I’ve come up to speed on a new platform and life at the early days of a technology start up.

We’ve felt good about the complete renovation of the interior. We’ve been luxuriating in the spa-like shower experience that Mrs. Snodgrass designed & executed, and hosting many holidays in the open plan kitchen/dining area. We reclaimed the backyard kitchen garden, successfully grew tomatoes (for the first time!), planted a mini fern garden, hosted about a billion BBQs and dog romps, and have discovered that our friends’ first choice for a birthday celebration is usually a home cooked meal at the Ranch.

2016 and 2017 have had their fair share of shit (you know what I mean). I won’t get into that here. However, there has been a positive by-product of this downturn of events for our community and our country. We have declared the Ranch a safe haven for our circle of friends – those we’ve known for years as well as some the amazing new friends we’ve made here in Portland and beyond.  2017 has brought us together with a number of folks from near and far that we’ve met through fandoms, Clexacon, Thorns soccer, Instagram (yep!) and being open to creating a supportive community.  The ranch has been a key part of this because we have the space to host guests, an open plan to sit and eat, play with the dogs, enjoy the fire, watch Amy Sedaris, etc. This place has became a default home base for our little community.

P.S. Here’s one update that is the kind of thing I would usually post: we had the gutters cleaned a couple weeks ago. During the Thanksgiving downpour, the most prominent gutter convergence near the front door was overflowing, which is about the worst place for a gutter failure. We thought: do we get up on a ladder (well, first buy a ladder that tall) and do this ourselves? I did a little research and it was about $125 to have them cleaned by “Neighborhood Gutters”. Sold! They even sent us some grainy before and after photos (my personal obsession):

Kitchen Before and Afters (Finally!)

After!

The kitchen before had some great qualities: spacious, big windows with lots of light, open to the living area, views of the side and backyard, plenty of room for appliances. Initially we thought we would keep the cabinets and just give them a good scrub. We planned to do what we did with the kitchen at the manor: refurb the cabinets, paint, replace the countertops & the appliances. Thinking this was the plan was probably how we allowed ourselves to buy the house and take on the project.

Then, we got in the house and saw how the cabinets were peeling in places, plus the smoke was entrapped in the cabinets, and that’s where our food was going to go, ew.

Here are the before & afters (after photos credit goes to Franzi, Scout’s backseat girlfriend):

Before 1
After 1: note the addition of a dishwasher!
Before 2. That sneaky cord leads to the refrigerator, which blocked the big window
After 2. We moved the refrigerator to the inside wall
Before 3. Behind that electric range was a hidden gem of an unused gas line.
After 3. We knocked out all the miscelaneous greasy cabinets above the range.
Behold: Hephaesta!

Once we got into the house we took a close look and said, ok – Ikea cabinets it is. Here are a few more (never before seen!) photos of the kitchen in progress:

The fun part
If you could read my mind, it would say “WTF”

Live Edge Bar Top

When we planned the kitchen counters, we wanted something heat-proof and impervious. Our last house had Paperstone, which had some great qualities (recycled, one piece,  nice-looking), it was high maintenance in the areas that got wet around the sink. It required oiling every month or so, and it couldn’t handle hot things.

For the kitchen in the ranch we wanted something heat and water resistant. With a tight timeline & budget, Caesarstone quartz from IKEA seemed like a good bet. So far, we are very happy with the Caesarstone. But we left the area by the bar open so we could take our time creating something more fun: a wooden bar top made out of local, live edge wood. (Queue the Portlandia music. Wait until you see our local, artisinally hand-hewn steampunk bar!)

In the middle of all the remodeling craziness when we gutted the kitchen, Laura got these beautiful pieces of Elm from Salvage Works. There is a cool story about this wood: these slabs are from a Siberian Elm tree that was removed to make way for the new Orange Max train line down to Milwaukie. We grabbed these pieces of wood knowing they were at least big enough to complete the bar, but exactly how we were going to install them was something Laura took her time stewing on while doing other projects.

Here’s the kitchen with the Ceasarstone installed, but a gap between the dining room and kitchen where the wood bar top was going to go:

kitchen-before-bartop

Here are the wood slabs before any cuts:

live-edge-closeup

live-edge-before.png

live-edge-in-progress-2

Laura broke down the larger pieces of wood at home with the table saw, then took them to ADX to do the planing and cut clean edges on all sides but the one facing the dining room. The two pieces needed to be joined in the middle with a dowel joint (creatively put together on site without a dowel jointer):

live-edge-in-progress-3

After much sanding and finishing, the bar looks great!  It’s my favorite place to lean and watch what amazing things are cooking up in the kitchen.

live-edge-complete

Roof Drama

The roof saga continues! The roofers put on the roof last week. It took them about 2 and a half days, and despite the discovery of some dry rot, everything seemed to go pretty smoothly. The roofing company was pushy about getting their final payment, but we told them to hold their horses while we had an independent roof inspector come take a look. If there’s one thing we’ve learned from this shit with the roof, it’s that you have to micromange every process and get specialist inspectors (not just general guys). Plus, this roof looked fine when we bought the house, but has given us a ton of problems, so we’re not signing off until we know it’s done correctly.

We had our roof inspector come out, and the guy is very detail oriented and loves roofs. When we worked with him in August to identify the source of the leaks, his whole thing was that there is a very exact science to putting on a new roof (nothing fancy) and that he would help us examine the work to make sure we don’t have the same leaking problems a few years down the line. THANK GOD WE HAD HIM OUT TO LOOK.

There were a bunch of issues. Sigh. First of all was their invoice for materials appeared to be about double what they actually used, and one of the items was a 14x mark up from the material pricing. Ok, got that – we can ask for receipts instead of estimates.

The other issues were due to incorrect installation and they were numerous:

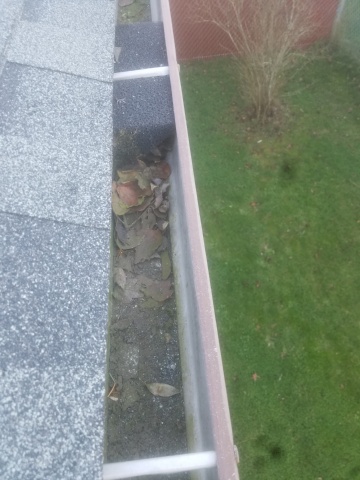
  • Incorrect nailing (pics below)
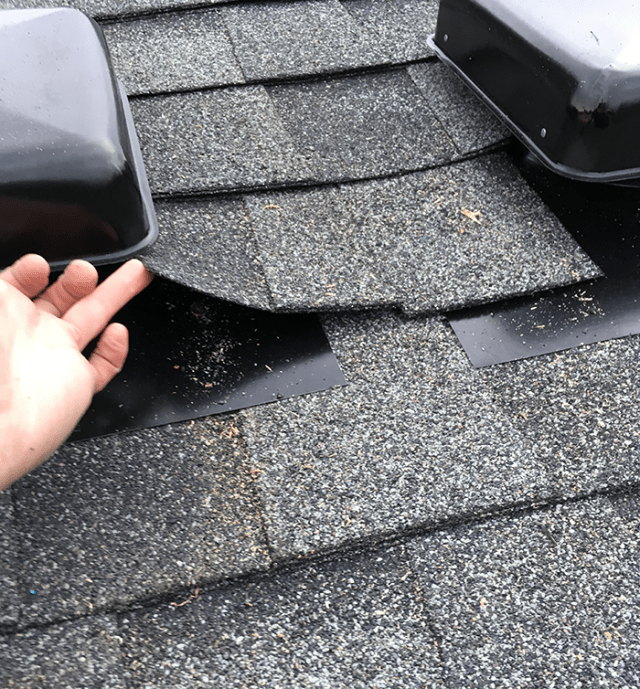
  • Flashing not glued down (also in pic)
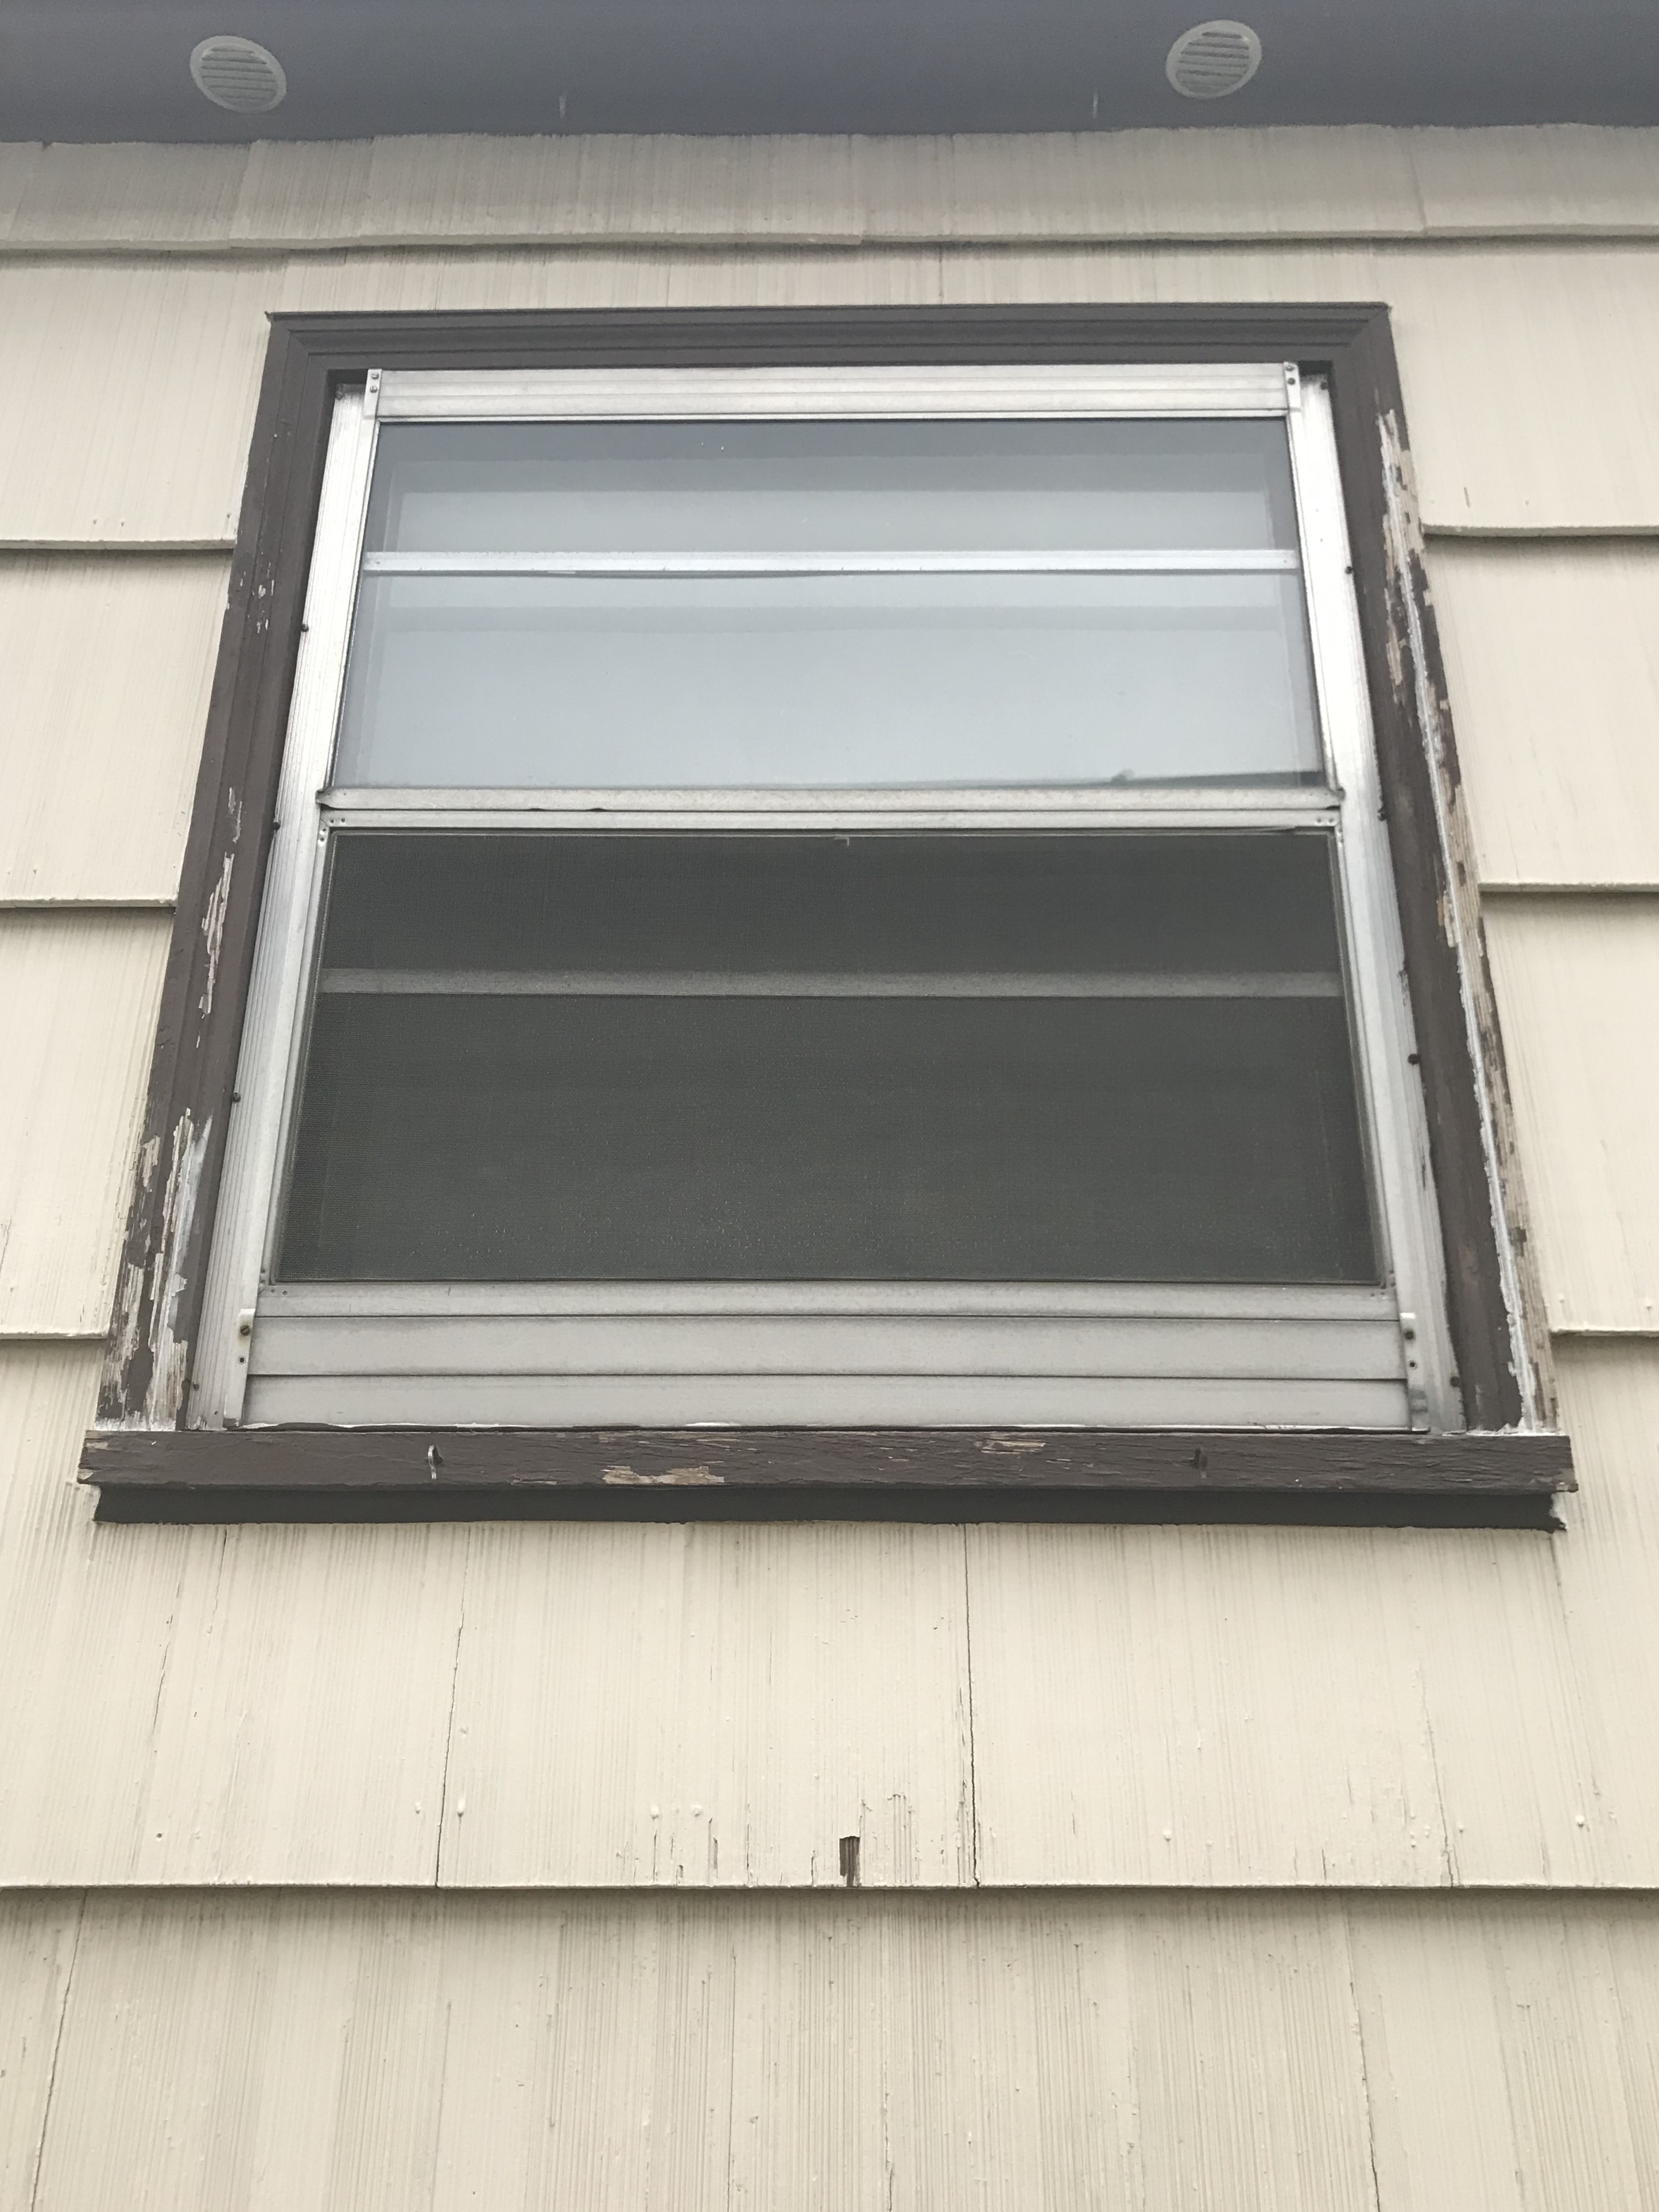
  • Ventilation incorrect (the contract specified ventilation would be done per Oregon code)

nails-1

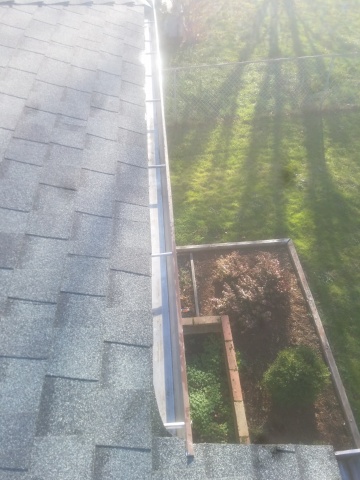
Here’s how they should be done:

nails-drawing.png

And this shit needs to be glued down:

should-be-glued.png

We emailed the roofers that we saw some issues and they needed to come see and fix them. They pushed back over email, saying that it was unlikely if not impossible that 85-90% of the nails were installed incorrectly. They also argued our other points, but agreed to come out and look.

The owner(?) came out and got up on the roof with us and we showed him the nails. The conversation up to that point had been us getting bossy and arguing, but this is when the conversation changed. When the owner saw how badly the nails has been done, he kinda flipped out. He started yelling at his manager that he brought with him that all of the nails had to be redone. Then he apologized to us, told us they could acually lose their Certainteed installation certification for this, and that he would have the entire team out after Christmas to redo the whole thing, plus bring the ventilation up to code.

So that’s where we are today. I can’t wait for this all to be behind us. A couple lessons that we have known but keep getting contronted with again and again: hire a specialist to make sure contractors are doing the work correctly, and don’t let contractors rush you into payment until you are satisfied. Seems simple, but people don’t always do those things.

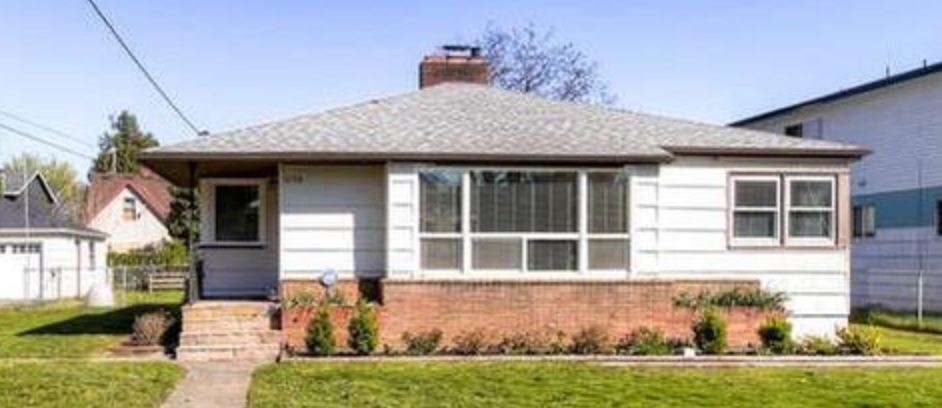
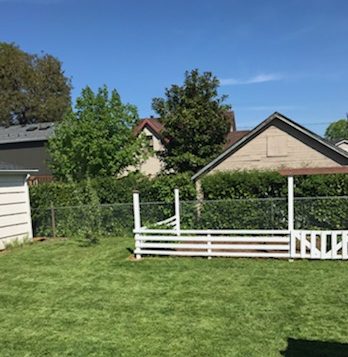
To prove that the drama with the house isn’t bringing us down, here is a pic of Strubgrass Ranch in the snow a coupel weeks ago, looking cozy & lovely:

ranch-in-snow.png