Bathroom Progress

before-drywall

after-drywall.jpgThe bathroom is slowly coming along. It’s starting to look less like a pile of rubble, and more like something on its way to a delightful, spa-like environment. The former plastic shower insert that we removed a couple weeks ago had some framing and additional walls to bring down the ceiling to the height of the shower insert. I don’t know why anyone would ever design it that way. It essentially cut off all the light to the shower and made the bathroom seem much smaller and more closed in. My guess is that the plastic shower insert was a relatively quick & easy solution to create a functional shower. And when you only have one shower in your house, you can’t afford much downtime.

Our drywall guy sounded like he could take down the additional framing, but as it turns out, he had a very brief window of time to work on our bathroom, and needed us to demo that section before he could start work. Ugh. Well, not a huge deal, especially since we are resourceful and have the added benefit of having some beefy friends.

The upper framing was put together with a shit ton of nails. It looks like the person who put it together was a DIYer (no shame in that!), but they used an overabundance of long nails to really secure the crap out of the shower framing. I understand why they didn’t use screws. They are more expensive and take longer. And they weren’t building it with demolition in mind. You can see the treacherous pokey nails (and smiling menfolk) below:

bathroom-bros

Regardless, Laura papped away at the section for awhile and dismantled a good deal of it using tools & physics. Then, our brawny friends came over and added some brute strength to the process. After over 2 hours of hammering, pulling,  cursing, & bleeding, the top section was out.

The drywall guy was able to seal up the ripped up area by the vanity, seal up the peephole to the hallway, and recreate a ceiling above the shower. Looking better already!above-shower

Adventures in Bathroom Renovation

toilet-wall
The bathroom has good bones. It has a big window, excellent light, a huge area for the vanity/sink, and good layout. The hardware & shower in there were in dire need of replacement, however. We knew when we bought the house that we had to eventually renovate the bathroom, and what better time than before moving in? I can’t imagine trying to renovate a bathroom while living in the house. There is a half bath downstairs which we have been using while renovating, but no shower. Plus, a couple of spiders live there and we don’t want to rile them up.

We think they redid the vanity in the 1960s (1968 to be exact), and the shower area looks like it was installed in the last ten years. It was an odd, slightly cramped plastic shower liner and pan. They built onto the ceiling to bring it down so the prefab plastic liner would all fit perfectly, creating a tomb-like shower experience. Ok, maybe that’s a bit dramatic. But I’m short, and it looked tiny to me. So, we pulled it all out. In addition, the shower drained slowly. That is usually a quick fix, but we had a plumber out to look at it and he noticed that there were 1.5 inch pipes leading out of the shower drain, and standard is 2 inches. So even if the drain was perfectly clean, the water would move through a narrow pipe more slowly. So that has been replaced.

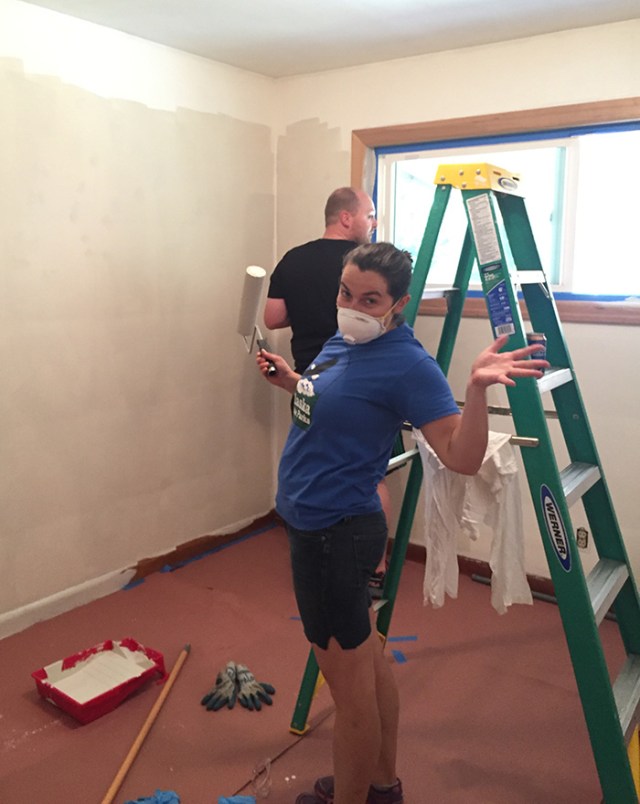
So the thing is… we are pretty handy, but we don’t have any actual training on how to do all this stuff – especially plumbing. Laura helped her family build a house growing up. She got to see how it was put together. She assisted with wiring, tile, construction, etc. She’s also an excellent problem-solver and an natural engineer. I’m house-obsessed and a pretty good designer. Between that, trips to the hardware store, and Youtube videos, we have been able to figure out how to do a lot of home renovation ourselves, and learn what to outsource.

The bathroom is at the convergence of what we are willing and able to do, and what we need to hire out. We are doing all these renovations without a general contractor. This is for a couple of reasons. The first is: Good luck getting a General contractor in Portland right now! The flurry of real estate sales and credit flowing has many of the good workers backed up for weeks or months. The other reason we’re handling it ourselves is that we’re not making major changes. No big construction or moving walls. We are simply removing the finishes and fixtures and replacing them. Mostly stuff we have done before. And the last reason: saving money, of course.

This means that we are learning as we go about who does what in what order. I thought it would be obvious: the plumber updates the pipes first, then you lay tile, then drywall and paint. We’re learning it’s a little tricker than that. The plumber fixes the 2 inch pipe, says they don’t do the pan, so you call the tile/pan guy, who is two weeks out. You also find out the infinity drain you ordered on Amazon last week doesn’t work, for whatever reason, so you go buy a new one. Then, you get a bid for tile, while your drywall guy is ready to work today, but not next week. And the plumber needs to come back after the tile is in, but when will that be? You get the idea…

Here’s the checklist and status:
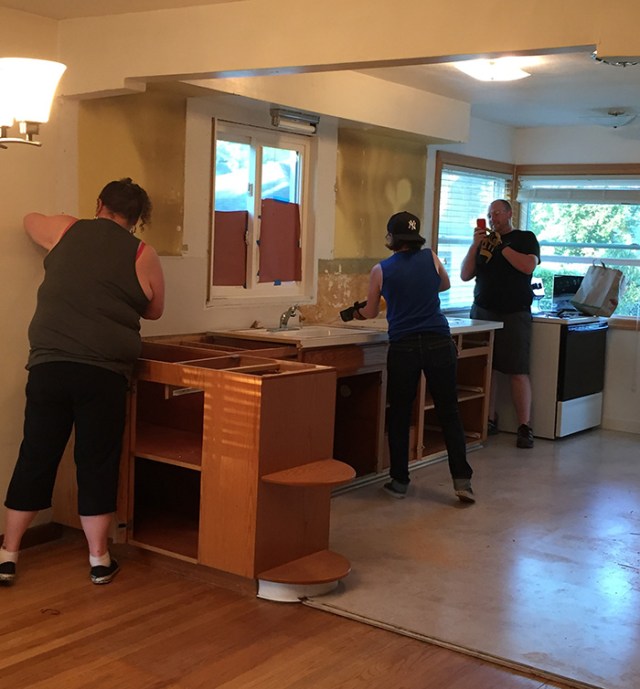
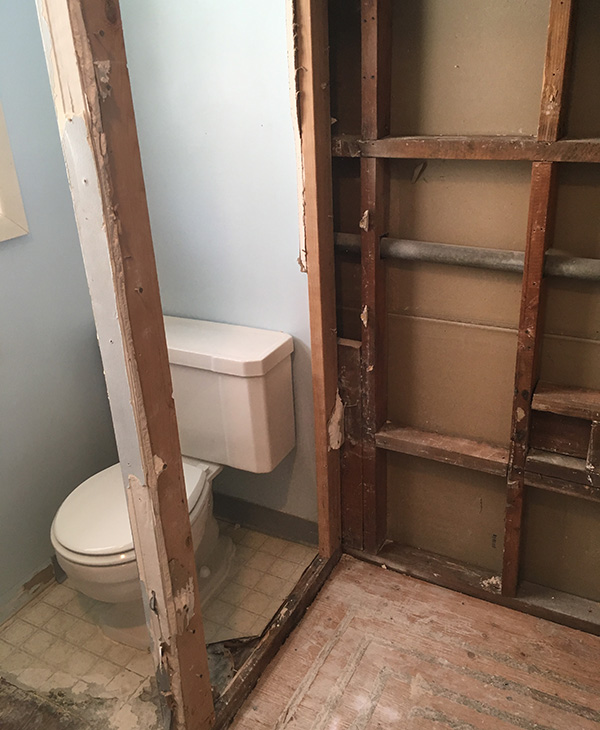
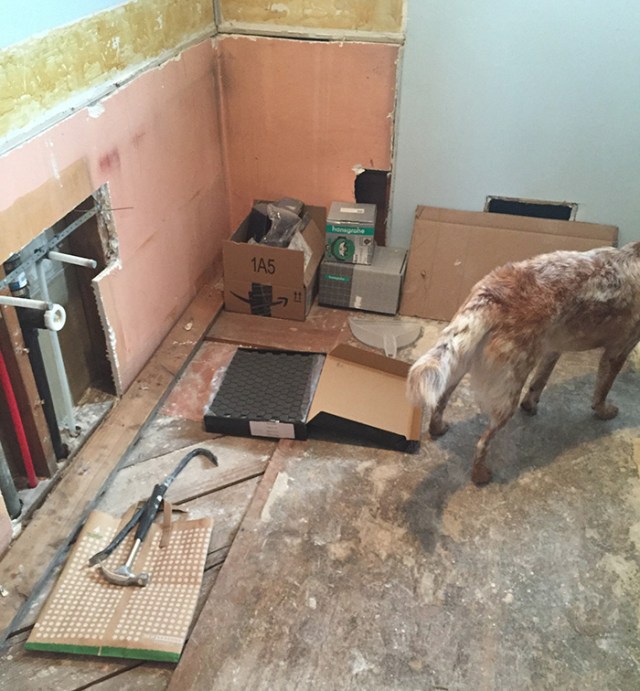
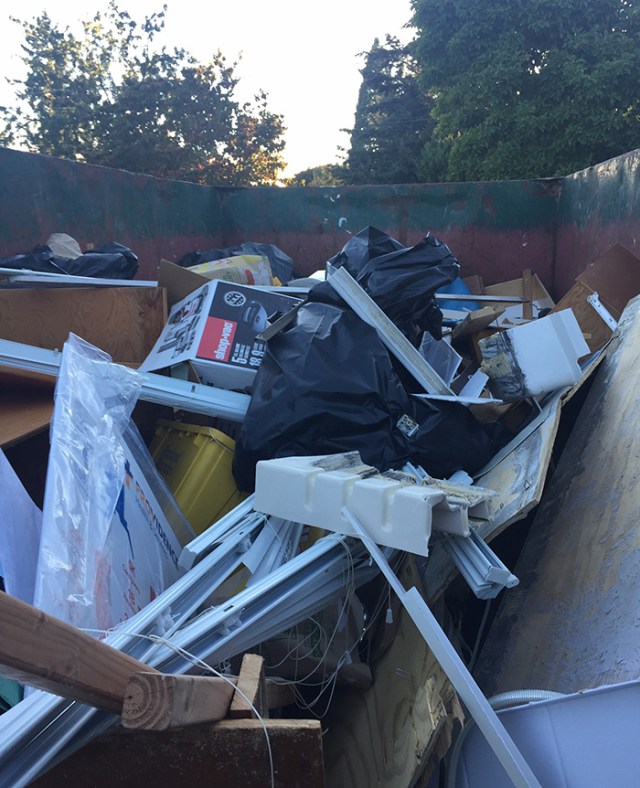
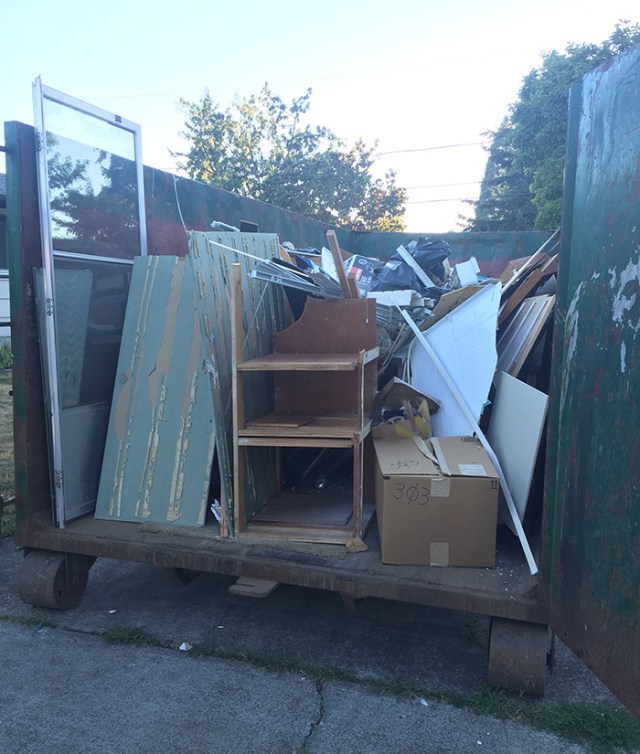
Demo: removal of existing vanity, shower pan. Check!
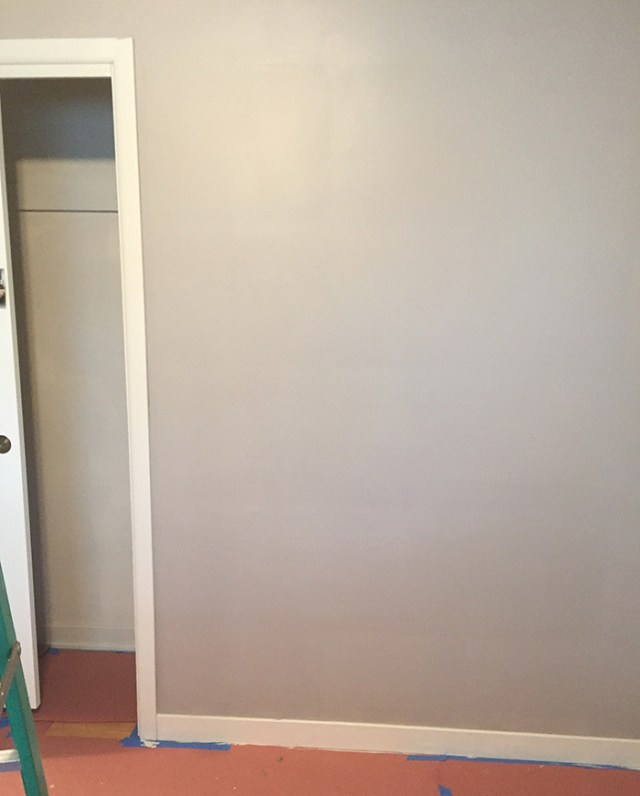
Prime & paint the walls (We have to wait for the drywall guy to make repairs first)
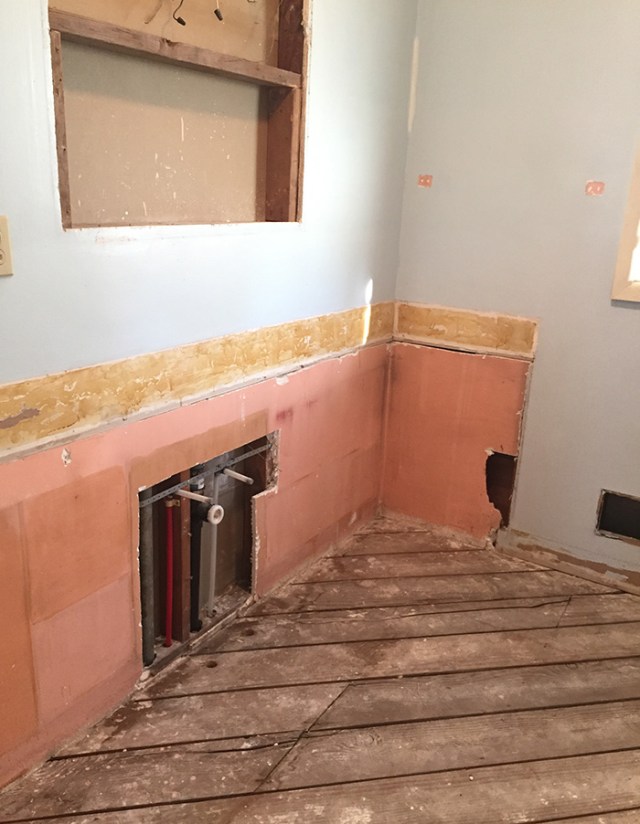
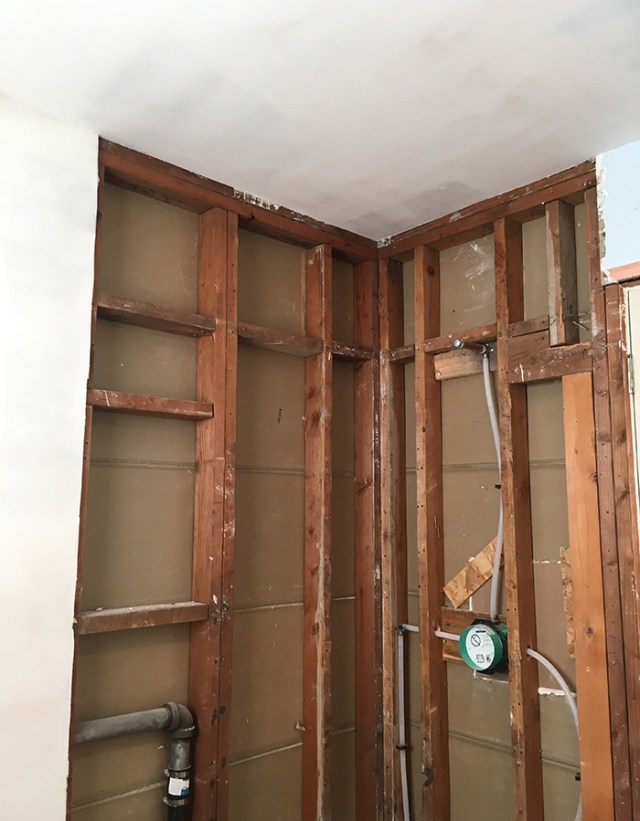
Shower plumbing: Replace the piping behind the shower, since there was something weird installed where everything was sideways and there was a giant hole in the drywall with a plastic cover (the shower peep hole, I’ve been calling it). Check!

Sink plumbing: the bathroom sink was piped with the incoming water coming out of the floor and the drain going into the wall. I’m told this is not standard (and makes no sense), so we had that fixed (you can’t see much, but here is the very expensive, very beautiful new plumbing on the left:

behind-sink-plumbing

Shower pan: When we called the plumber, they implied that they could install a new shower pan. But then they came out and said no, they do all the backend stuff but they don’t do showerpans anymore. 😐 So we called a tile guy (not an easy feet in a backed up market right now) who we found on Thumbtack and are getting this queued up
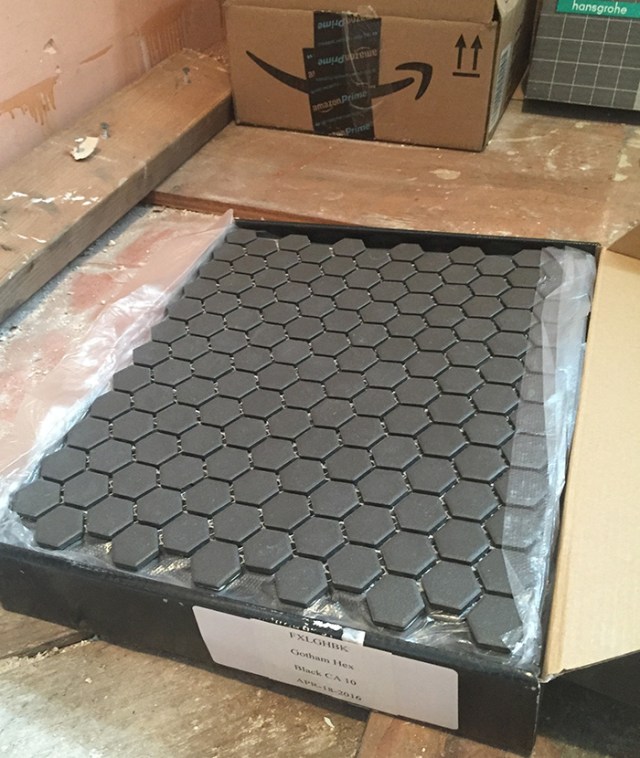
Tiling: we were going to do this originally, but it sounds like the tile/floorpan guy will include it in a quote and heck, I bet they are faster
than we are, and time is money

tiles

Shower glass: We are doing floor to ceiling glass shower doors, and there are installers that do just that one thing, and we’re on their list. They can’t measure or start work until the tile has been installed

Drywall: We have a drywall guy (I’ve read in many places that drywall is one of those things that for the skills and tools involved, it’s better to hire someone)

Sink: We have to drag in and install the vanity. We’ve got that part, as long as we get a little help from our brawny friends, since it weighs 230 lbs.

In summary, the bathroom has been a learning experience and is far from complete. The challenge has been sorting out how much we can do, what we need to get professional help for, and the other wild card: The order in which things are done. If we ever redo another bathroom (which we will, downstairs), we will get to apply the lessons. The bathroom is the most important thing right now, because we can move in with the kitchen still under construction, but the bathroom has to be 100% done first. My wife insists on being able to shower in her own home (go figure). It’s going to be a fantastic bathroom, much improved and nicer than any bathroom we’ve ever had before. But we’re not quite there yet.
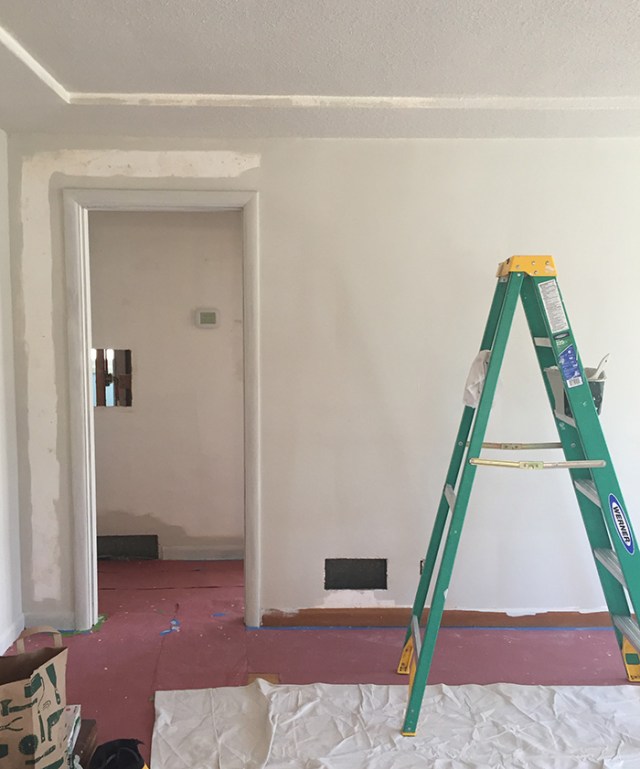
 

Still Painting.

ANOTHER post about painting?? That’s what I’m thinking, too! We continue to chip away at finishing interior primer and paint on the whole house. We go over to the house, spend a few hours painting, think we are close to being done, then see all the areas that need a second coat or whose trim hasn’t been painted yet. Or those #%*#$%* areas by light fixtures that are a pain to do.

Paint-1

The rolling application is very satisfying. You cover so much wall in a short amount of time, even when you consider second and third coats. But then there’s the edging, and the trim (which needs at least 24 hours to dry between coats). And the closets (thanks, Laura!). When I start to feel discouraged, I remind myself that we are priming & painting every surface (including ceilings, insides of closets, and raw wood trim that has never been painted) of a decent-size 3 bedroom house that a month ago was covered in cigarette smoke tar. We’ve had a ton of help from our friends. We just need to keep going.

Paint-2

If there’s one takeaway from all this painting, it’s that slow and steady wins the race. I forget this whenever starting a painting project. It seems easy and you just want to get that paint up on the walls already! However, if you go quickly and apply the early coats unevenly, you’ll have to go back in and add more coats and fix the inconsistencies. You really have to zen out and accept the process.

Radon Be Gone

One of the inspections we did on the house during escrow was for radon. Having always lived in places without basements, I didn’t even know what it was. So I had to look it up.

It’s an odorless, naturally occuring, radioactive gas that comes from the ground (earth farts?) in certain pockets. It can collect at unhealthy levels in houses, especially ones with basements. It’s hazardous at some levels, especially for people with other risk factors (like smokers, which sadly, the people who lived here before us were). It’s a known carcinogen for lung cancer.

We got the radon test back in April (which was optional, but recommended by our realtor) and braced ourselves for the news, good or bad. As it turns out, the house had very high radon levels. The below shows the acceptable level of 4.0 pCi/l, and the house measured way above that, as high as 16 at some times, with an average of 11.6 pCi/l.

Radon-test-before

Yikes! After a mini-panic to absorb the news and to consider the hazardous state of the home, I did some research to see what we were dealing with. As it turns out, radon is seriously no bueno, especially living in it day in, day out. However, it’s fairly easily mitigated. The fix involves having engineers dig a hole in the basement and route the gas away through a pressurized fan that runs 24/7. In addition to installing the pipe and the fan, they also provide a monitor that continuously tells you how many of these earth farts are collecting in your home.

The cost of installing a radon mitigation system is about $1600. That is a lot of money when you are doing a ton of other fixes, but not much when you consider you are removing a known carcinogen. It was a no-brainer that we were going to have it done. We negotiated a price reduction to the house by $1600, so the sellers basically paid for it. I wish that for their sake, they had installed it when they moved in.

The system was installed this week. It’s pretty unobtrusive and discreet in a out of the way corner of the basement. Here’s what it  looks like from the outside:

radon-system

It’s another weird tube coming out of the house, but considering its benefits, it’s acceptable, even beautiful. The measurement of the radon gas in the house after installing the mitigation system was 0.5 pCi/l (down from an average of 11, with a standard benchmark of 4).

Paint Color Conundrum & Decisions

We are almost getting to the fun part of the project: the final layer of painting & putting on color.

Painting the primer was an epic ordeal. Because we were getting rid of smoke smells, we had to coat everything (including closets, doors, all trim) with a serious oil based primer. This primer isn’t one of those nice, low-VOC paints. It’s smelly, gluey to apply, and dries very quickly, which means you have to do as much of it as you can in one go.

ladder-paint-for-web

niosh-masks-for-web

It has gone really well. The smell of the paint was as bad as expected, but we wore Niosh masks and powered through it. The other good thing is that its drying time is about an hour, so it didn’t linger too long with open windows on the rooms that we finished. We did 2 coats in many areas. After the TSP wall wipe down, it feels like days upon days have been spent on removing smoke tar from  walls. We were musing that we should get a tax break for the smoke mitigation, since it feels like we are a hazmat clean  up crew that is going through a painstaking & expensive process to make this space clean & healthy again.

In the interest of expediency, we selected our favorite color from the Manor to cover all rooms of the house. It’s a fantastic neutral color that is really versatile. We decided to pick one variation to the monochrome of the house in the bedroom. We wanted dark and elegant. We got a bunch of color samples to test on the walls. Something we learned at the Manor was that a color looks one way on a card at the paint store, but then you paint a big test square on the wall and get unexpected results. A color you thought was perfect looks terrible. Or a color you were lukewarm about looks amazing, and that is the one  you fall in love with. This was the case with our bedroom testing colors.

testers-for-web

We were excited to go super dark in the bedroom, but all the dark grays had too much color tone in them (blue, green, brown). Plus, we got a little spooked by the intensity of the colors in a small room. I like dark walls, but every dark wall color inspiration I  found was too dark. On a whim at the paint store we selected a lighter gray to test (“functional gray”) and BOOM! That was a keeper.

Here’s how it looks after the first coat:

bedroom-in-progress-for-web
We are going to do something a little flashy on the wall behind the fireplace. It’s the first wall you see when you walk in the door and anchors the mantle & fireplace. We’re geoing to paint it a snazzy gold/bronze and build some horizontal reclaimed wood panels. Now this is where it gets fun!

gold-for-web

A Giant Waste Bin of Renovation Refuse

bin-2-for-web

Laura had the excellent idea of getting one of those giant container waste bins delivered to put all the demolition refuse in. I had been researching one-off loading & hauling solutions where you call some guys who have a big truck and they load and haul it for you. Laura’s idea on the container delivery was much better, because we had it for a whole week and could add to it throughout that time.

It wasn’t cheap, but way cheaper than hiring people to get rid of that quantity of crap. I researched the cost to haul just the old carpet, and it was more than half of what having a huge bin for the whole week ended up being. Even if we had a truck (like that 1998 Ford F-150 the missus has been eyeing), we would have had about 10 labor-intensive & costly trips to the dump if we were to have done it that way.

Another benefit was that since we scheduled it for a week, it gave us a reasonable deadline to complete the demo, and also the sense of urgency to take advantage of the flat rate we were paying and get rid of anything that was borderline.

Here’s a partial list of the contents:

– wall to wall carpet & pad
– a billion staples from the old carpet & linoleum
– old linoleum (3 layers) & the plywood it was attached to
– kitchen countertops & cabinets
– bathroom linoleum
– bathroom vanity, sink, & hardware
– bathroom shower pan, plastic liner, & hardware
– a weird outdoor carpeted lattice ramp (for dogs and/or humans)
– old busted screendoor
– various garbage from the backyard
– metal blinds from the bedrooms that we managed to break within 2 minutes of trying to use them

bin-1-for-web

The last benefit was that after the took the full bin away, it was like all that old crap was magically gone. Well, not really, since we pulled it out ourselves with some serious blood, sweat & tears (not an exagerration). But when we came back to the house and the container had been picked up, it felt like we had moved into a new, more fun phase of the project: rebuilding the ranch and make it somewhere we can’t wait to live!

Painting Party

kirsten-painting-for-web

The entire house is pretty smoky & dingy so we have to paint 100% of it, including the ceilings, inside closets, all trim, etc. We have to do at leats one coat of heavy-duty primer and at least one top coat of the actual color. My forearms hurt just thinking about the rolling, the brushing for days. I love painting, the fun you can have with color, and the instant satisfaction, but the number of walls & surfaces to cover here is a little daunting.

Thankfully, we have awesome friends who like to paint and have been willing to share their time & energy to help us with this project. Over the weekend, Laura rustled up some vittles for a real chuck-wagon style food line up on the patio. Since we had pulled out the kitchen, this was a true Iron Chef challenge. Laura pulled this off with only a weber grill, a couple of coolers, and a washroom sink downstairs. Somehow she managed to keep everything food safe and not poison the work crew (which would have been pretty counter productive!)

dave-megan-painting-for-web

The previous owners had carefully painted one of the bedrooms a pale pink with periwinkle trim (top pic). I can appreciate the work they put into it, but both the Mrs. and I have a serious aversion to pastels on walls.

Our color plan is to paint the entire house (including formerly unfinished wood window & doorway trim) a light gray/neutral color that we loved in our old house. It’s Ace Hardware “Travertine” and it really does have the earthy gray/brown of travertine stone. Then, after we get everything covered with that neutral color that we can live with indefinitely, we’ll probably have some fun with color down the line.

grillin-for-web

Bathroom Demolition

Bathroom-listing-pic-for-web
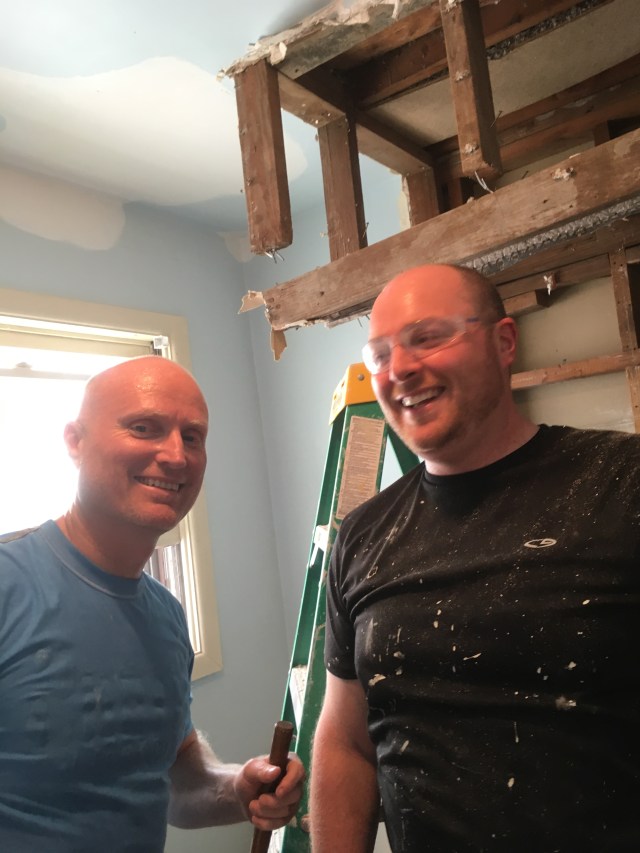
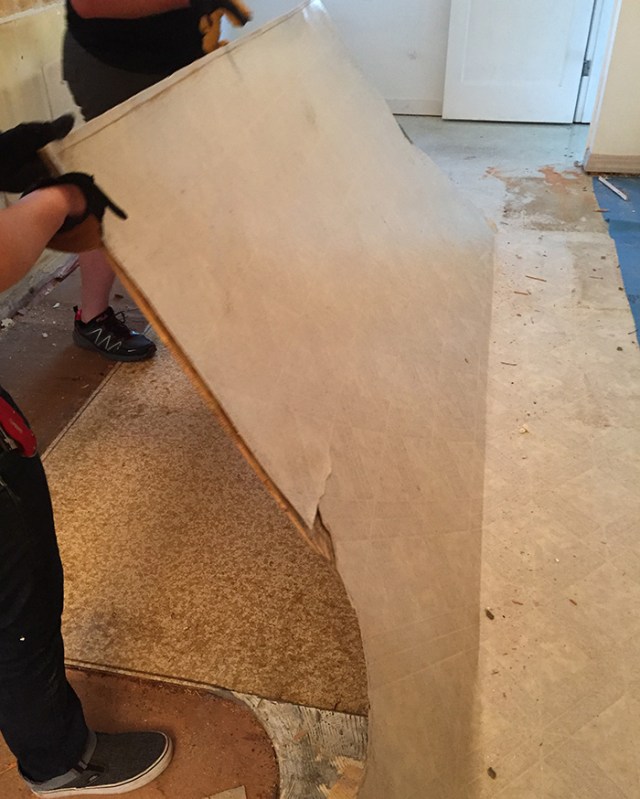
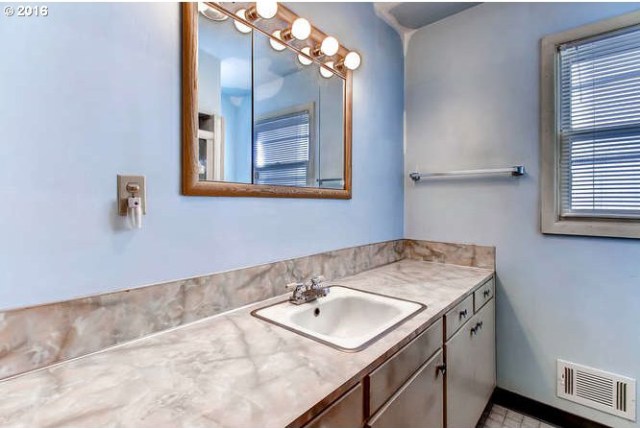
The existing bathroom in the ranch is a little funky. Good space, a nice big window, but ancient linoleum, a rickety vanity, and one of those weird one-piece plastic shower inserts that looks a little claustrophobic. We’ve decided to replace all this, but not move any of the plumbing or make any major changes. The plan is to demo the existing vanity & shower insert, then replace the vanity with a new one-piece and replace the shower with a simple tile wall & new hardware.

Bathroom-in-progress-for-web

bathroom-rip-out-for-web
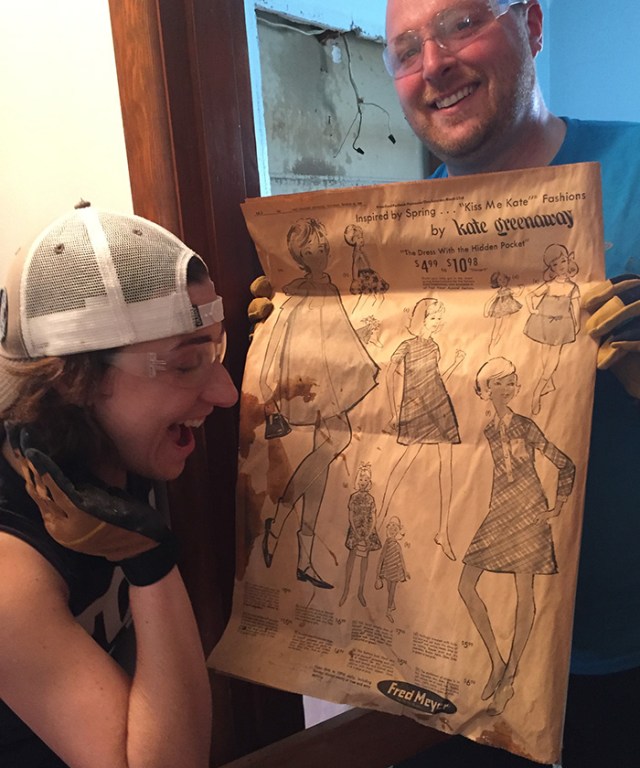
Nestled behind the vanity was a newspaper from 1968. It was perfectly placed behind the vanity cabinet, perfectly dry and in  tact, like someone put it there as a time capsule. The house was built in 1955, but it looks like someone rebuilt the vanity in 1968 and stuck that paper back there. That seems more likely than a full section of newspaper falling behind the vanity and remaining perfectly preserved for almost 50 years.

I love finding stuff like this in renovations! Here’s a pic of Dave & Laura posing with a full page ad for fashions from Fred Meyer (featuring dresses with hidden pockets for $4.99):

newspaper-for-web

Kitchen Demolition

Yesterday felt super productive. We prepped the walls for painting, which included patching a bedroom that appeared to have been used as a thumbtack pincushion for several decades. We also patched some larger, more prominent areas that had peeling paper or other large mysterious gaps.

laura-on-ladder-for-web

The exciting part was the kitchen demo, which we didn’t even start until about 6 pm last night. That’s when our crew was off work and able to lend a hand. We used a combination of hammering, kicking, crowbars, and sawsall to take out the upper cabinets and main countertop/sink area. Our crew did an amazing job, with Dave receiving the “He-man Award for Outstanding Application of Hulk Smash”, and Mary earned the “Most Colorful Curses while Deploying a Crow Bar” award. Laura won the “Feminism” award for best use of sawsall.

dave-mary-demo-for-web

team-demo-for-web

I didn’t think we would get to the floor. It was clearly several layers of linoleum that looked like a huge challenge to remove. We couldn’t clearly count the layers from the side view, but they totalled at least an inch high, which did not set up a good transition from hardwood floor to the kitchen – major trip hazard there.

Since the kitchen countertop & cabinets came out pretty well, we decided to attack the flooring as well. We removed the uppermost layer of linoleum (which included a layer of plywood). Then, after that came up, we attacked ANOTHER layer of linoleum & plywood. There was a total of 3 layers of linoleum and plywood on top of the subfloor. When we got to the last one, which appears to be the original from 1955, we decided to stop there. That layer will make a great base for our new cork flooring, plus we didn’t want to rile up the structural layer below.

flooring-demo-for-web

Epic Wall Wipe-down + Dumpster Delivery

ceiling-wipe-for-web
As part of the smoke-removal process, we’re wiping all surfaces (including walls, doors, closets, ceilings, shelves, weird nooks & crannies) with a TSP solution to break up the smoke accumulation and prep the walls for painting. This entails mixing a 5 gallon bucket of TSP solution and warm water, brushing it onto all surfaces, then taking a sponge mop with clean water to mop up after the brush. It seems to be working pretty well – the sponge water is filthy (gag) and the dingy visibe smoke is subsiding.

Smoky-corner-for-web

There are fun, exciting parts of home renovation (like removing the carpet and picking out finishes) that are very satisfying and you have a tangible transformation to show for your time & effort. TSPing the walls isn’t one of those. It’s taken about 2.5 days with 2 to 3 people working on surfaces. And it’s not ergonomically friendly, and I’m old. Before I turn into Complainypants, I will say that we are 95% done with this part and super excited to move on.

Our dumpster got delivered on Tuesday (yay!) and now we can get serious about demolion!

dumpster-for-web